
Insulating a flat roof from the inside is a practical solution for homeowners aiming to enhance energy efficiency, reduce heating costs, and improve indoor comfort. Whether you’re renovating an existing structure or addressing insulation issues in a new build, this guide provides a detailed, step-by-step approach to internal flat roof insulation.
Why Insulate Your Flat Roof Internally?
Flat roofs are notorious for heat loss due to their minimal pitch and exposure to the elements. Internal insulation offers several benefits:
-
Energy Efficiency: Reduces heat loss, leading to lower energy bills.
-
Comfort: Maintains a consistent indoor temperature throughout the year.
-
Moisture Control: Proper insulation prevents condensation, reducing the risk of mold and structural damage.
Materials and Tools You’ll Need
Before starting, gather the necessary materials and tools:
-
Insulation Material: Rigid foam boards (e.g., PIR or phenolic boards) are commonly used for flat roof insulation.
-
Vapor Barrier: To prevent moisture ingress.
-
Fixings: Screws, washers, and adhesive suitable for your insulation material.
-
Tools: Measuring tape, utility knife, drill, screwdriver, and safety equipment.
Step-by-Step Guide to Insulating a Flat Roof from the Inside
Step 1: Assess the Existing Roof Structure
Begin by inspecting the current roof structure for any signs of damage, moisture, or mold. Address any issues before proceeding with insulation to ensure the longevity and effectiveness of your work.
Step 2: Measure and Cut Insulation Boards
Measure the dimensions between the joists of your flat roof. Cut the rigid foam insulation boards to fit snugly between the joists. Ensure a tight fit to minimize air gaps, which can compromise insulation performance.
Step 3: Install the Insulation Boards
Place the cut insulation boards between the joists, ensuring they sit flush with the bottom of the joists. Secure them in place using appropriate fixings or adhesive, following the manufacturer’s guidelines.
Step 4: Apply a Vapor Barrier
Once the insulation boards are in place, cover them with a continuous waterproofing membrane. This layer prevents moisture from penetrating the insulation and causing damage. Seal all joints and edges with appropriate tape to ensure an airtight seal.
Step 5: Install Additional Insulation (Optional)
For enhanced thermal performance, consider adding an additional layer of insulation beneath the joists. This layer can be fixed directly to the joists and should also be covered with a vapor barrier.
Step 6: Finish with Plasterboard
Finally, fix plasterboard over the insulation and vapor barrier to create a finished ceiling surface. Ensure all joints are sealed, and the surface is ready for decoration.

Tips for Effective Flat Roof Insulation
-
Choose the Right Insulation Material: PIR and phenolic boards offer high thermal resistance and are suitable for flat roof applications.
-
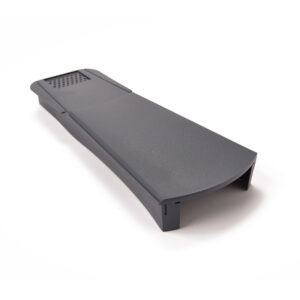
Ensure Proper Ventilation: Adequate ventilation prevents moisture buildup and prolongs the life of your roof structure.
-
Comply with Building Regulations: Ensure your insulation meets local building codes and regulations for thermal performance and fire safety.
Common Mistakes to Avoid
-
Ignoring Moisture Issues: Always address existing dampness or leaks before insulating.
-
Poor Installation: Gaps between insulation boards can lead to thermal bridging and reduced efficiency.
-
Inadequate Vapor Barrier: Failing to install a continuous vapor barrier can result in condensation and mold growth.
Benefits of Professional Installation
While DIY insulation is feasible, hiring a professional ensures:
-
Expertise: Professionals can identify and address potential issues effectively.
-
Compliance: Ensures adherence to building regulations and standards.
-
Warranty: Professional work often comes with guarantees, providing peace of mind.
Conclusion
Insulating your flat roof from the inside is a cost-effective way to enhance your home’s energy efficiency and comfort. By following this step-by-step guide, you can achieve a well-insulated roof that stands the test of time.
Ready to Improve Your Home’s Energy Efficiency?
If you’re considering insulating your flat roof or need professional advice, contact our expert team today. We’re here to help you make informed decisions and ensure your home remains comfortable and energy-efficient year-round.


