Roofing leaks are never good news. The raison d’etre of a roof is to stop water ingress, so any that’s getting in means something, somewhere, has gone wrong. Fortunately, it’s definitely possible to slap on emergency protection with some quality roofing materials and keep your roof safe until proper professionals can arrive.
This will likely involve working on a ladder and a roof. If you are not comfortable doing both, this project should not be attempted. Working at elevation is dangerous.
You will need:
- Safety Gloves and Safety goggles
- A tarpaulin
- Some sturdy cords
- A bucket
- Cromapol
- A disposable brush
- A hose connected to water
- A roofing ladder
- An assistant
- A broom
- A pencil
Emergency Roof Repair Process – Finding the Leak
The first thing you need to do is locate the leak. This will allow you to begin working out how to address it. When you go up on the roof take up a hose and begin spraying water, while your assistant sits in the loft and looks for water penetration, carrying a broom. Once the assistant sees water dripping from the ceiling, they should make a pencil mark there and begin tapping there with the broom. This will draw your attention to the area that should be near the leak.
Once you get there, begin to look for areas where damage might have taken place. Pay particular attention to anything with a seam – such as flashing. Any sort of joint in the roof is going to be the most likely place where a leak has developed.
Emergency Roof Repair Process – Addressing the Leak
After finding where the leak is, you’ll need to start addressing the situation. First port of call is a tarpaulin. A “tarp”, as they are commonly known, will help you shield the leak while you implement a semi-permanent solution. Just take the tarp up the roof and hang it over the affected area, then use the cords to tie it to sturdy areas like the chimney to keep it in place.
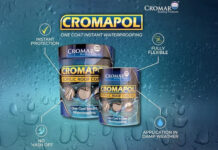
But to really put in an emergency fix, you’ll need waterproof paint. Several different varieties such as Cromapol and Acrypol are available. These are made of fibres and an acrylic solution that is waterproof. Even better, they protect right from when they are painted on, meaning you don’t need to worry about rain after they’ve been applied.
To get going with Cromapol or any other waterproof paint, just use a disposable brush to paint a coat over the area. Any brush covered in waterproof paint fibres will be unusable afterwards, so disposable ones are preferred. A single even coat should be enough for the leak. After this, you should look into ringing some professionals and arranging an appointment for them to come and permanently fix your leak, safe in the knowledge that it won’t trouble you for a good while.


