Slate is an extremely popular material for roof tiles. It is hugely water resistant, resilient against temperatures both high and low, and can handle harsh UV rays. Furthermore, it accomplishes all of this while providing a pleasing appearance with its little smooth dark grey panes. However, the structure of slate roofs has made installing it on low pitched roofs difficult.
Specifically, the trouble zone is with roofs above 10 degrees in pitch (below which they would be considered a “flat roof” and not suited for any kind of tiles) and below 20 degrees. The lower the pitch the less the force of gravity acts upon any water on the roof. This means that the water can start to flow sideways because of a complex effect called capillary action.
Combined with the small panels this is a recipe for disaster. The smaller the panels, the more joins there are in a given surface area. This means that when that water starts flowing sideways it has a higher chance of entering through the joins since there are more of them. Slate tiles are much smaller than conventional tiles.
How to Install Slate on a Low Pitched Roof
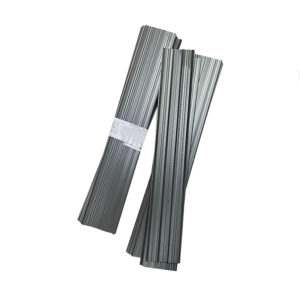
Installing a slate roof at a low pitch would therefore require something to prevent this water penetration. Fortunately, Permavent has developed a patented product called Easy Slate. These small plastic strips are each installed between each single slate tile and the next one along in a course.
These strips serve to both reduce the vulnerability of the gap between slates and also provide channels for which water, which was previously moving sideways, to flow downwards instead. If they are installed then it improves the water resistance of slate enough to allow it to be installed on a low pitched roof.
Generally slates should be installed by professional slaters. However, if you are comfortable working on a roof with scaffolding and have enough know-how to install slates, you can do it yourself.
Follow the normal process for installing a slate roof but after placing each tile install a single Easy Slate strip until you have reached the end of the course. It is installed by sliding the flat section underneath the slate till the slate is flush with the seal. Then the next slate should be placed flush with the other end of the seal. Cut this strip so that it is exactly as tall as the slate tiles are.
Easy Slate usually has one point of fixing, where the clout nail drives through both the slate and the strip. When slates are fixed with spiked hooks instead an additional nail should be hammered through the top of the exposed strip into the batten.


