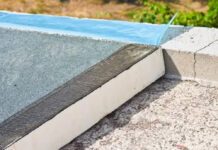
Along with dry verge and dry ridge, dry hip forms the final part of a dry fix roof. Dry fix refers to using non-mortar fixings to secure verge, ridge, and hip tiles in place. Unlike verge and ridge, dry hip doesn’t tend to have dedicated kits. Rather, hip support trays are used in combination with dry ridge kits to support hip tiles.
This article will explain how to install a dry hip system. If you are not fully comfortable working on a roof and a ladder, then it’s best to look into hiring trusted professionals to implement this project instead. Working at elevation can be dangerous.
You will need:
- Safety gloves and goggles
- A roofing ladder
- Battens, 50x25mm
- Enough ridge kit for all the hips on your roof
- Enough Hip support trays for all the hips on your roof
- An angle grinder
- A tape measure
- A utility knife
- Screws
- A power drill
- A handsaw
- chisel (if working on an existing roof)
- Felt nails
- Roof and Gutter Sealant with Sealant gun
When calculating the amount of battens, kit and support trays you will need, remember that the battens will be 50mm long, the kits are usually 6m long and the support trays 1.2 metres long. The hip support trays will have 100mm overlaps between each other. Since you will be using 50x25mm battens as spacers as well, you will need a lot more than just enough to cover the hip.
How to install a Dry Hip System
If working on an existing roof, use a hammer and chisel to destroy the mortar of the hip tiles and carefully remove them without breaking them. You should also remove the first layer of tiles nearest the hip so you have some space. Now you can begin cutting the battens so that they can be screwed to the hip rafter, joining up the horizontal tiling battens to create a flat surface. You may need to stack two cut battens on each other. Then you can lay a continuous layer of battens over the previous ones, screwing them in as well. You may need to double layer these battens as well depending on the type of tiles you have. Then replace the non-hip tiles.
If working on a new roof simply do this before laying any tiles. After that, lay the tiles except the hip tiles.
Now you should start rolling out the vent roll. Every half a metre use a felt nail to secure the roll. It should overlap the ridge by 100mm. Then remove the sticky tape covering on either side of the roll and push it so each side totally adheres to your tiles.
After this, you need to start placing hip support trays. The ones at the bottom of the eaves should have the bottom corners trimmed to make sure it won’t stick out from the hip tile at the eave. Work your way up until you reach the ridge, leaving a 100mm overlap.
Tiling Process
Now you can start tiling. Secure each hip tile at the eaves with a screw into the hip rafter or battens, then place a union and another hip tile, and screw in that union. Repeat until you have reached the ridge.
Finally, you will need to make sure that the ridge and hip tiles can link. Use an angle grinder to mitre the three of them, secure them into place with screws, then use roof and gutter sealant to seal the seams so that water cannot penetrate.


