
In terms of value for money there’s no better investment you can make in your roof than dry ridge. The ridge is the apex of a pitched roof, and traditionally ridge tiles were fixed in place with mortar. However, mortar is very vulnerable to weather especially during winter, and over time can be very expensive to repair. Dry ridge is a mortarless solution that allows tiles to be fixed in place with screws and waterproof unions instead. This massively reduces the time and money spent maintaining your ridge.
Dry ridge can be implemented during the construction of a house. However, it can also be installed on a currently existing roof, by removing the current mortar and installing the dry ridge system needed to fix the ridge tiles in place.
Remember, going up on a roof is very dangerous. Unless you’ve had prior roofing experience it’s best to bring in a trusted professional to install your dry ridge rather than doing it yourself.
This guide is specifically for ERoofing’s dry ridge kits. Another brand’s dry ridge kit might differ in its specifics, but the general principles should be the same. Always defer to official instructions.
You will need:
- A safe ladder
- Safety gear
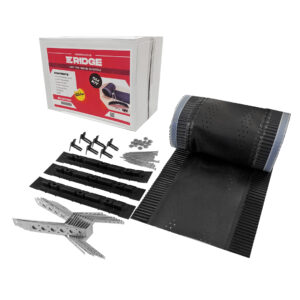
- Dry Ridge Kits (enough to lay across the entire length of your ridge)
- A screwdriver
- A power drill
- 25mm Battens (enough for two tiling battens that run the length of your roof and one ridge batten made up of two stacked tiling battens that overhangs by 75mm either side of your ridge. A roof with a ridge board may need the ridge batten to be three tiling battens high.)
- A utility knife
- A hammer and chisel
- A tape measure

How to Install Dry Ridge: Making measurements
You’ll need enough dry ridge to cover the whole of your ridge. In addition, every section of ridge felt needs to overlap the next by 75mm and it also needs to overlap the gable of the roof on either end (unless your roof has hips either side of the ridge).
How to Install Dry Ridge: Removing the tiles
The first step is to remove the currently existing ridge tiles. The mortar needs to be chipped away with a chisel so they can be safely removed. The same ridge tiles will be replaced once the dry ridge system has been installed. Take care not to damage these tiles or you will need to purchase replacements. The layer of tiles just below the ridge tiles on either side must also be removed.
How to Install Dry Ridge: Battens and Brackets
The second step is to install the ridge batten. This is the central batten that the dry ridge will be screwed into. It is made of two battens stacked on each other. If your roof has a ridge board it will need to be three battens high instead.
Then the brackets must be installed. You may need to trim the underlay so there is a 30mm gap either end of the zenith of the roof. This allows for ventilation. Then the brackets can be placed so they fit over the ridge batten. They can be secured in place with nails.
Tiling battens can then be fixed in place over the wings of the brackets. This will allow for the tiles just under the ridge tiles should now be put back.
How to Install Dry Ridge: Felt and Re-tiling
Now, the ridge felt can be rolled out. You want it to overlap by 75mm every time you add a new section of felt, as well as enough to fold over the gable either side of the ridge if the ridge meets the gable. You want to place it so it is directly in the centre of the ridge batten so that it overlaps the tiles on either side.
Now it is time to start laying the ridge tiles, starting with one of the end ridge tiles. Set each one so that it is properly centred, then slide the plastic ridge union under it, then secure the union using the screw and washer along with the clamping plate. Then set the next tile and repeat until the entire ridge is secured.
After this you will need to secure the end ridge tiles. You should drill through them and fix them into place by screwing them into the battens. Even if your ridge meets an abutment you should do this with both ends. This lets them resist wind uplift. If you’re not using block end ridge tiles you also need to make sure you use end caps to seal off the end of the ridge tiles from water, dust, debris, insects and small animals.


