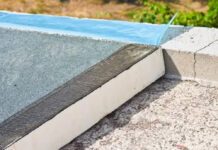
Insulating a Flat Roof: Inside vs Outside
A warm flat roof is insulated from the outside and a cold flat roof is insulated in the same way but from the inside.
Warm flat roof
The top layer of the insulation of a warm flat roof consists of a waterproofing membrane, which is positioned on top of the insulation board, with a vapour control layer underneath it. These are then secured over the timber decking and the roof joists below remain uninsulated. The roof joists can be topped with a layer of plasterboard enabling you to decorate your living space.
Having the vapour control layer in place will inhibit condensation and moisture from passing through the roof structure, and the waterproof membrane will protect the building from the effects of wind and rain.
Cold flat roof
With a cold flat roof, the waterproof membrane lies on top of the timber decking. The insulation boards are fitted within the joists of your roof and the vapour barrier is positioned below them, with the plasterboard ceiling below that.
Key Steps for Insulating a Flat Roof
Here is a step-by-step guide on how to insulate a flat roof.
- Install a layer of plywood or OSB (oriented strand board) across the timber joists, which will function to provide a base and a solid foundation for the remainder of the roof structure.
- The vapour control layer should then be positioned below the joists, in order to reduce the risk of condensation and moisture, and to maintain the integrity of the roof’s structure over time.
- You should mark out on the vapour control layer where fixings will pierce the membrane, as to ensure they will align at rafter centres and at the correct axial spacing.
- Where the vapour layer will be pierced, you should place butyl tape to create a seal and prevent moisture infiltration.
- The insulation board should be placed between the joists at the desired thickness. The appropriate thickness will be determined by the available height.
- You should install a second layer of the plywood or OSB board to reinforce the roof structure, this enhances the durability of the roof structure and its load bearing capacity.
- Fix the deck together using helical fixings, ensuring to securely fasten all components, reducing the risk of displacement.
- Lastly, install a waterproof membrane on top of the timber decking, to finish off the deck and protect from the build-up of wind and rain.
Benefits of Properly Insulating a Flat Roof
There are many benefits when it comes to insulating a flat roof. Some of these include:
- Protecting your roof, preserving its condition for a prolonged period of time
- Keeping your home warmer in the winter and cooler in the summer months
- Reducing energy bills
- Reducing CO2 emissions.
Common Challenges to Consider –
- Integrating the waterproofing system
Ensuring that the insulation and waterproofing system work together is essential, if they are ineffective this can lead to leaks and a reduction in the lifespan of your roof.
- Space limitations
There may not be significant space between the roof surface and the ceiling, meaning this may limit the types of insulation that can be used.
- Condensation
Flat roofs are more at risk to the build-up of condensation, as when warm air from the inside of the building meets the cold surface of the uninsulated roof, condensation forms and can lead to dampness and mould growth.
- Load bearing capacity
The insulation method and material need to consider the roof’s ability to bear additional weight, especially when opting for heavy insulation materials.


