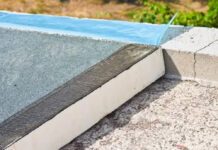
Mortar is a contradiction. It provides strength to bricks and is therefore vital to the house’s strength, but itself is quite fragile in the face of the weather. Mortar is porous, full of air bubbles, and therefore gets worn down by the weathering process quite quickly. Water enters the pores, freezes and expands, causing damage, then the process repeats.
Therefore, maintaining the mortar on your brickwork is important. In the past you would need an expert to handle this task because of the complexity of mixing mortar. However, with today’s advanced technology, you can easily repoint the mortar on your own outer walls even as a novice DIYer.
You will need:
- Safety Goggles and Safety Gloves
- Angle Grinder or Hammer and Chisel (see below)
- Everbuild Mortar Pro Pointing Gun Kit
- Spear & Jackson Mortar Master Pointing Trowel
- Bostik Cement Pointing Mortar
- Utility Knife
- Cleaning Cloth
- Hand Brush
- Enough Tarpaulin to cover the whole wall
Repointing the Mortar
Depending on whether you are repointing a smaller area of brickwork or a larger area, you may be able to accomplish your task with just a hammer and chisel or might need a angle grinder. Either way, firstly you need to use that tool to carve away the crumbling old surface mortar. Carving this away will clear out room for the repointing. After grinding it out, you should use a cleaning cloth to remove any loose bits of mortar as well as any grime, oil etc.
Now you can begin the repointing. Select the appropriate nozzle size for your Everbuild Mortar Pro Pointing Gun kit. Then make a small incision in the unnozzled head of the Bostik Express Cement Pointing Mortar cartridge, taking care not to damage the thread that screws into the nozzle sheath. Now just screw the sheath in and pop that cartridge into the gun and place the pre-selected nozzle over it.
Apply the mortar to the joins precisely and leave it for five minutes. You may need to squeeze the trigger repeatedly to get the mortar to begin getting pushed out of the cartridge. Then get your trowel and push it into place. There are several ways to do it that leave different effects, but one popular one that’s appropriate even in areas of heavy rain is the weatherstruck pattern, where the mortar is flush with the brick below it and slowly sucks in as you go up. This diagonal finish prevents water from pooling, acting as essentially a tiny pitched roof.
Now you can use a brush to remove any errant blobs of mortar, and use warm water to clean your trowel, gloves and any other looks. Use a tarpaulin to cover the wall to make sure that rain doesn’t affect the mortar, since until at least 5 hours has passed it will be vulnerable to water.


