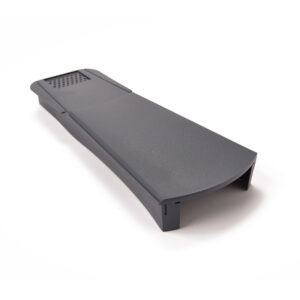
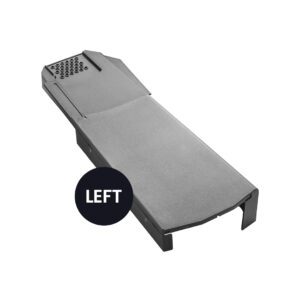
Dry fix products – dry ridge, dry hip and dry verge – are all very significant improvements to your roof. They replace fragile, easily weathered and expensive to maintain mortar, fixing these tiles in place with screws and waterproof union instead. However, while these products are easy to install, it’s still possible to do it incorrectly. Incompetent professionals or those who are rushing jobs can easily leave behind dry verge that falls apart at the first sign of serious wind or weather. So how can dry verge be repaired?
Identifying badly installed dry verge
The most common issue with installed dry verge is that the mortar has not been removed. This is a clear sign of what is generally referred to in the industry as a “bodge job” or a “cowboy job”. Mortar takes time to remove but it is an important process. This leaves room for air currents to affect dry verge without acting on the caps themselves. If the mortar is not removed then the wind has nowhere to go and will just rip the caps off like a thirsty bar patron. It’s easy to check and see if the caps are installed over mortar just by standing underneath the verge and looking up.
Other, less common issues might be even more readily apparent. If the dry verge in the middle has been poorly implemented – often due to ignoring recommendations and instructions regarding how the units need to be fixed to the tile battens. Sometimes they might not even be fixed in place at all. If you’ve ever seen the humorous picture of verge units coming away from the tiles while still linking as a chain, this is why.
Further Problems
Another issue that crops up is difficulty with end caps and starter units. These can sometimes have complex installation procedures. Making sure that you can follow all of the manufacturer’s procedures precisely when reinstalling can help solve this.
Sometimes if the verge is not draining to the gutter properly it can cause problems. The excess water spillage can damage your walls. Getting dry verge that can properly drain into the gutter is paramount.
Finally, sometimes the incorrect type of dry verge has been used. This might not even be mechanically relevant – sometimes the dry verge just looks really tacky. In this case you will need to purchase a completely different dry verge, one which is suited for your roof better and is both mechanically and aesthetically the correct choice.
How to repair dry verge
In order to repair dry verge you will first need to remove the original dry verge. If you’re not very comfortable working on a ladder or a roof then you should hire professionals – and preferably, better, more trusted professionals than the ones who put it in to begin with.
Remove the original dry verge by starting at the top and working your way down. Unscrew the end cap, then the unit attached to it, and so on until you reach the starter unit. In some cases this dry verge will simply be put back and you won’t need to replace it. If individual sections are damaged or it’s the wrong kind for the roof you will need to replace it.
Once you have removed the dry verge you can start to address the main issue. For mortar, you will need to do what the previous roofers avoided and remove the mortar with a hammer and chisel, before installing the new dry verge. Make sure to expose as much of the tiling batten as the manufacturer recommends – 20mm is common, for instance.
Otherwise you won’t need to remove water, just address the issue – making sure that the dry verge can drain into the gutter, or installing improperly assembled dry verge the right way. Dry verge can be a pain if it’s not done right. However, when it is, you’re saving yourself from a major headache in the future.
In all cases you will need:
- Safety gloves
- Safety goggles
- A ladder
- A power drill with bits for the fixings that the verge uses
If you are trying to reinstall dry verge that was installed over mortar you will need:
- A hammer and a chisel
- A power drill

 Code 5 Cast Lead - 360mm x 6m


